The clinch knot is a classic, but it has fallen out of fashion in recent years. With more technology around to do the hard work for us, many new anglers are unaware of these once simple skills.
If you are looking at this article, hoping to bridge the knowledge gap, then we applaud you!
Although there is an “improved” version of the clinch knot, we want to show you the original first. You can decide which one is easiest for you.
How to Tie the Improved Clinch Knot (Fly to leader)-Method
Creating a clinch knot is easy; simply follow these simple steps, and you’ll be on your way.
Step 1: Using the tip of the line, feed it through the eye of your hook. If you are not using a hook, feed it through the eye of your lure or fly instead.
Step 2: Pull the line back down, forcing a couple of inches to feed through the eye. You should now have two ends, one a couple of inches long while the other is much longer.
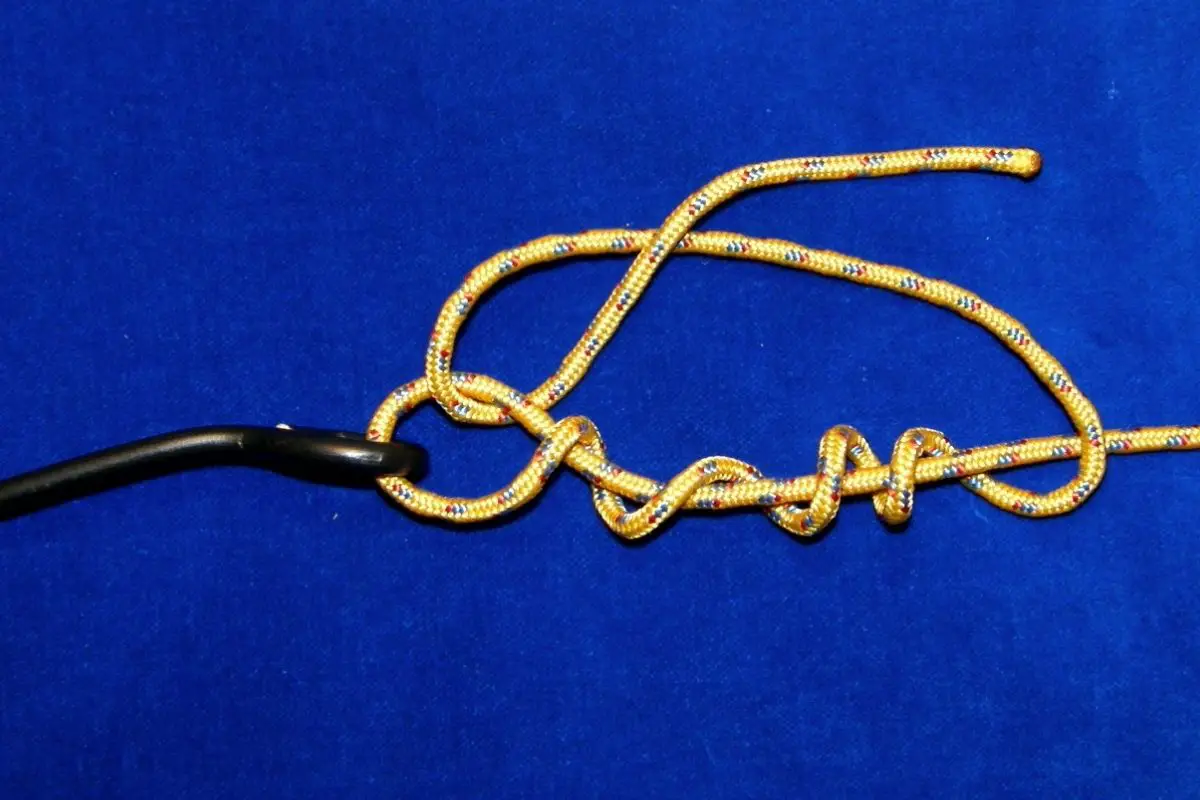
Step 3: Twist the short end around the long end of the line. Do this 5 or so times. While you are doing this, be sure to leave a big gap between the first twist and the hook. This is to create a loop, which you will need later.
Step 4: With the last twist created, feed the rest of the line back up through the loop.
Step 5: You may need to moisten the line at this point to make it move without friction. Once the line is ready, pull the short end to create the knot.
Step 7: Trim any excess.
And there you have it; you have created a clinch knot. Well done!
How To Tie An Improved Clinch Knot – Method
Tyger Leader is reader-supported and may earn a commission when you book or purchase using our links. Learn more about our affiliate disclaimer here.
The improved clinch knot is very similar to the original; however, there is one more step.
This additional step is meant to make the knot stronger, so if you are fishing for a heavier catch, you may prefer this option.
Follow the steps below, however steps 1 through to 4 are the same as above:
Step 1: Using the tip of the line, feed it through the eye of your hook. If you are not using a hook, feed it through the eye of your lure or fly instead.
Step 2: Pull the line back down, forcing a couple of inches to feed through the eye. You should now have two ends, one a couple of inches long while the other is much longer.
Step 3: Twist the short end around the long end of the line. Do this 5 or so times. While you are doing this, be sure to leave a big gap between the first twist and the hook. This is to create a loop, which you will need later.
Step 4: With the last twist created, feed the rest of the line back up through the loop.
Step 5: You will have created an extra loop from step 4. The loop would be from the bottom of the knot formation to the top. Put the shorter line through this newly created loop to complete the improved clinch knot.
Step 6: You may need to moisten the line at this point to make it move without friction. Once the line is ready, pull the short end to create the knot.
Step 7: Trim any excess.
As you can see, both knots are very similar; however, you may prefer one to the other.
Tips When Tying A Clinch Knot
When you create the clinch knot, you might find a couple of issues. These tips should iron out any problems you may have.
Overlapping Coils
If your coils overlap, then the knot will unravel when there is too much weight put on it. When you pull the line in Step 5/ Step 6, do so slowly.
Tight Coils
When you create the twists, you should try to make them small. This will help them avoid overlapping and should allow you to create a tight lock.
Not Tightening Enough
If the coils aren’t tightening and keep falling loose, then you might not be pulling hard enough. As soon as you pull the end of the line, trim off the remaining material. This should stop any weight from peeling back the coils.
Heavy Lines Need Fewer Twists
If your line is heavy, you may find that the knot is too weighted and is uncoiling. To stop this, try using fewer twists.
Ideally, you should be using a light line when creating a clinch knot.
Don’t Cut Off Too Much Excess Line
If you cut off too much of the excess line, the weight of the fish could be enough to unravel the coil.
Ideally, you should leave at least one inch of line left to prepare for this issue.
Advantages And Disadvantages Of The Clinch Knot
The clinch knot is an easy knot to master. It works perfectly with most fishing needs and doesn’t need any fiddling about to create it.
Admittedly, the improved clinch knot is just as easy but a little stronger. This means that many people prefer the newer method.
The only downside to the clinch knot or improved clinch knot, is that it doesn’t work well on heavy or thick lines.
Alternatives To The Clinch Knot
If you like the idea of a clinch knot, but it isn’t quite rocking your boat, try these similar methods instead.
Palomar Knot
The Palomar knot is great for braided fishing lines, and the knot is just as strong as the clinch. Like the clinch, it will be hard to untie, so be sure you want to use it before you make an attempt.
Trilene Knot
The Trilene knot follows the same loop and twist system as the clinch but has a couple of additional steps. This makes it even stronger than the clinch. It isn’t as great on braided lines, but it can hold your heavy fish.
San Diego Jam Knot
Again, this knot is similar to the clinch but has a couple of extra steps. This makes it stronger still but a little more fiddly. It goes well with mono, braided, and fluorocarbon lines.